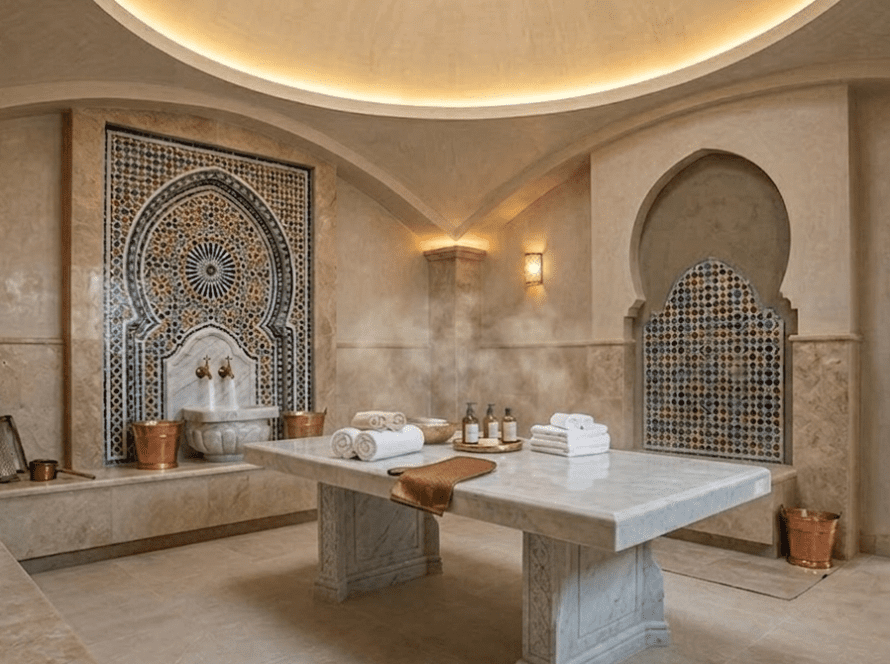
Zellige — the hand-cut, individually fired glazed terracotta tile that has defined Moroccan architecture for over a thousand years — is one of the most visually stunning materials in any UAE hammam. Its irregular, jewel-like surface catches light differently from every angle. Its rich, earthy glazes bring an authenticity to modern wellness spaces that machine-cut tile simply cannot replicate. When zellige is right, it transforms a room.
When it starts cracking, it is a different story entirely.
Cracked zellige in a UAE hammam is a problem that is far more common than it should be — and far more often misunderstood. Many property owners assume the tiles are simply defective, or that cracking is an inevitable consequence of the material’s handmade nature. In reality, zellige cracks in UAE hammams almost always have a specific, identifiable cause — and in most cases, that cause is preventable, and the damage is restorable.
This guide explains exactly why zellige tiles crack in UAE hammam environments, how to assess the severity of the damage, what restoration options are available, and when the job requires a specialist rather than a DIY approach.
Why UAE Hammams Are Particularly Harsh on Zellige
FACTOR | UAE HAMMAM CONDITION | IMPACT ON ZELLIGE |
Water Hardness | TDS 400–600+ ppm — among the world’s highest | Mineral deposits penetrate glaze micro-cracks and expand, worsening crazing |
Temperature Cycling | Hammam surfaces reach 40–55°C, then cool to ambient 22–24°C with AC | Repeated expansion/contraction stresses the glaze-clay bond |
Humidity Levels | 90–100% RH during use — rapid drop when room cools | Moisture penetration into porous zellige body, then fast drying stress |
Ambient Temperature | Summer exterior walls reach 60–70°C — significant heat transfer to internal walls | Thermal gradient between heated hammam and hot exterior wall creates additional stress |
Installation Variations | UAE installations use a mix of local and imported adhesives and grout | Incompatible products between the zellige body and adhesive bed are a common failure cause |
Cleaning Practices | Hard water descalers (acidic) used on zellige glaze surfaces | Acid etches and weakens the glaze layer, creating new fracture points |
The combination of these factors means that zellige in a UAE hammam experiences stresses that the same tile would simply not encounter in a traditional Moroccan hammam — where the water is soft, the seasonal temperature swing is moderate, and the heating method (traditional wood-fired hypocaust) produces a slow, even heat distribution rather than the rapid electric or steam heating used in modern UAE wellness installations.
The 6 Primary Causes of Zellige Tile Cracking in UAE Hammams
Understanding the cause of cracking is the essential first step before any restoration work is attempted. Repairing zellige without addressing the underlying cause results in the same damage recurring — often more quickly than the original failure.
Thermal Shock and Rapid Temperature Cycling
The most common cause in UAE hammams — and the most misunderstood.
Zellige tiles expand when heated and contract when cooled. In a UAE hammam, this cycle is repeated multiple times daily — the room heats rapidly when the hammam is activated, then cools down under air conditioning between sessions. Traditional zellige was designed for a gentler, more gradual heat regime. The modern UAE pattern of rapid heating and cooling creates thermal stress in both the tile body and the glaze layer.
- The glaze and the clay body have different coefficients of thermal expansion — when they expand and contract at different rates, the glaze develops crazing (a network of fine surface cracks)
- Over time, crazing lines deepen and develop into actual through-cracks in the glaze
- In severe cases, the entire tile face spalls — the glaze layer physically separates from the clay body
This failure mode is more severe in tiles installed near the hammam heat source, steam nozzles or floor drains where temperature differentials are greatest
Moisture Penetration and Freeze-Thaw Analogy
Not freezing — but the same mechanical principle applies in the UAE’s humidity-AC cycle.
Zellige’s porous terracotta body absorbs moisture during hammam sessions. In the UAE, this is compounded by extremely hard water — the moisture that penetrates the tile body carries dissolved minerals. When the air conditioning kicks in after a session, the surface dries rapidly while moisture and minerals remain trapped deeper in the tile. The mineralised water inside the tile body then begins to crystallise as it dries, and the crystallisation process generates significant outward pressure within the tile’s pore structure.
- This process — known as salt crystallisation or subflorescence — is the same mechanism that causes masonry to spall in freeze-thaw climates
- In the UAE, the ‘freeze’ equivalent is the air conditioning drying cycle that causes rapid moisture loss from the surface while the interior remains saturated
- The result is progressive weakening of the tile body, leading to surface delamination, edge chipping and eventually full cracking
Tiles installed in floor positions or near drains, where standing water contact is prolonged, show this failure most severely
Incorrect Adhesive or Insufficient Coverage
The failure nobody sees — until tiles start cracking.
Zellige tiles are significantly thicker and heavier than standard ceramic or porcelain tiles — typical zellige is 12–14mm thick versus 6–8mm for standard tile. They also have an irregular back surface due to their handmade nature. These characteristics demand a flexible, polymer-modified tile adhesive applied with full-coverage technique — meaning the adhesive bed is worked to eliminate all voids beneath the tile.
- Void spots beneath the tile: when an area beneath a zellige tile has no adhesive support, that section has no resistance to point loads — foot traffic, thermal movement, or even a dropped item can crack the tile directly over the void
- Rigid adhesive: standard cementitious adhesive without polymer modification cannot accommodate the thermal movement of zellige in a high-temperature environment — it cracks at the adhesive layer and transmits stress upward through the tile
- Over-rapid installation: zellige installations in UAE construction projects are sometimes rushed — adhesive that has not fully cured before the room is brought up to heat will fail, and the tiles will crack or de-bond
Wrong adhesive for wet areas: using non-waterproof adhesive in a hammam environment allows water penetration to the adhesive bed, causing progressive bond failure and ultimately hollow-sounding, cracked or lifting tiles
Structural Movement and Building Vibration
Less common but significant in UAE high-rise and tower properties.
UAE high-rise residential and hotel buildings experience natural structural movement — seasonal thermal expansion and contraction of the building frame, wind load deflection in tall towers, and transmission of vibration from mechanical plant, lifts and construction activity on adjacent plots. Zellige, installed rigidly without adequate movement joints, cannot accommodate this structural movement.
- Missing movement joints at wall-to-floor junctions, wall-to-wall internal corners, and at regular intervals across large tiled areas are the primary structural failure cause
- When structural movement is transmitted to the tile bed without relief, stress concentrates in the weakest point — typically the tile face at its thinnest section, or at existing glaze micro-cracks
- This failure mode produces a characteristic cracking pattern — typically diagonal cracks running from corner to corner of the tile, or consistent cracking along specific lines that align with the building’s structural grid
Tiled areas directly above or adjacent to expansion joints in the building structure are particularly vulnerable
Incompatible Cleaning Products
A preventable cause — but one of the most widespread in UAE hammams.
The UAE’s hard water means that limescale accumulates rapidly on zellige surfaces, and many property owners and cleaning teams reach for the most effective descaling product available — often a strong acid-based cleaner. This is the most damaging thing that can be applied to zellige tiles. The traditional glass glaze on zellige contains calcium and silicate compounds that are directly attacked by acidic cleaners.
- Repeated acid application progressively etches the glaze surface — initially dulling the characteristic lustre of the tile
- As the glaze is thinned by acid attack, it becomes structurally weaker and more susceptible to thermal and mechanical stress
- Eventually, the weakened glaze begins to crack and spall — a failure that is often mistaken for thermal cracking but is actually chemical degradation
Even vinegar — frequently recommended as a ‘gentle’ descaler — is too acidic for regular use on zellige and will cause cumulative glaze damage over time
Poor Original Installation or Non-Specialist Fitting
The root cause of many UAE zellige failures — and the hardest to remedy without full re-installation.
Zellige tile requires specialist installation knowledge. It is not a tile that can be installed by a general tiler following standard ceramic tile procedures. The variable thickness of handmade zellige requires the installer to bed each tile individually using the traditional floating method, or to use a deep-bed adhesive system that accommodates thickness variation. Installations that treat zellige like uniform machine-cut tile — using a standard notched trowel and comb adhesive application — will leave voids that eventually lead to cracking.
- Non-specialist installation is responsible for a significant proportion of UAE hammam zellige failures — particularly in projects where cost pressure leads to inexperienced tile-setters being used
- Incorrect grout joint width — zellige traditionally uses very narrow joints of 1–2mm, and widening joints to 4–6mm to compensate for uneven tiles changes the stress distribution in the installation
- Improper surface preparation — installing zellige over an uneven substrate without a screeded level base creates high spots that concentrate stress on the high-point tiles
- Failure to pre-soak zellige tiles before installation — dry zellige draws water from the adhesive bed before the bond is established, causing premature adhesive failure
Assessing the Severity of Zellige Cracking — 3 Stages
Before any restoration work begins, a thorough assessment of the cracking severity is essential. The stage of damage determines whether DIY repair is appropriate, whether a specialist is needed, or whether a full re-installation is the only viable solution.
STAGE | SEVERITY | SIGNS | RECOMMENDED ACTION |
1 | Early — Glaze Crazing | Fine surface crack network visible in glaze; no tile movement when pressed; no hollow sound on tap | Specialist cleaning, acid-free maintenance protocol, and annual monitoring — no tile removal required |
2 | Moderate — Through Cracks | Visible cracks through glaze into tile body; some tiles hollow-sounding when tapped; no lifting | Individual tile replacement + adhesive and substrate assessment — partial restoration appropriate |
3 | Severe — Structural Failure | Multiple cracked or missing tiles; tiles lifting or loose; water ingress visible; substrate damage | Full-section or complete re-installation — specialist mandatory; may require waterproofing membrane renewal |
How to Restore Cracked Zellige Tiles — A Step-by-Step Guide
Restoration of cracked zellige tiles in a UAE hammam environment is a specialist task in all but the most minor cases. The following guide covers the correct approach — both for DIY assessment of early-stage damage and for understanding what a professional restoration should involve.
01 | Identify and Document All Damaged Tiles Before touching anything, photograph and map every cracked, hollow or missing tile in the installation. Number them on a sketch plan of the hammam. This documentation serves two purposes: it ensures no damaged tile is missed during restoration, and it creates a baseline record for any warranty claim or insurance assessment. • Use the tap test to identify all hollow tiles — mark with masking tape • Photograph each cracked tile in close-up — note the crack pattern (diagonal, horizontal, radial, or glaze crazing only) • Check grout lines for signs of movement — grout that is crumbling, cracked or missing at wall-to-floor junctions indicates structural movement as a contributing factor • Check the floor for any slope towards drains — water pooling against wall bases accelerates moisture failure |
02 | Source Matching Replacement Zellige Tiles This is often the most challenging step in UAE zellige restoration — and one that cannot be rushed. Zellige tiles are produced in batches in Morocco, and each batch produces a unique colour variation even within the same named glaze. Tiles purchased months or years after the original installation will rarely be an exact match. • Contact the original supplier first — they may have stock from the same batch or a close match • For high-visibility areas in hotels or luxury residential properties, consider importing a matching batch directly from the original Moroccan producer • For patches in less visible areas, a close-colour match is usually acceptable — zellige’s naturally varied surface means slight variation is less obvious than with machine-cut tile • Order at least 20–30% more tiles than you think you need — some breakage during cutting is inevitable with zellige |
03 | Carefully Remove Damaged Tiles Without Damaging Adjacent Tiles This step requires significant skill and patience — damage to adjacent tiles during removal is one of the most common and costly mistakes in zellige repair. The grout between zellige tiles must be cut out first using a specialist grout saw or oscillating multi-tool with a grout removal blade — never a chisel alone. • Remove grout from all joints surrounding the damaged tile before attempting to lift the tile • Use a flexible steel palette knife or a specialist tile removal tool to work progressively beneath the tile — avoid using a bolster chisel which transmits shock to adjacent tiles • Work from the centre of the tile outward — the thinnest, most fragile section of zellige is at its edges • If the tile does not release easily, apply heat with a heat gun for 30 seconds to soften the adhesive bed slightly — this reduces the force needed and protects adjacent tiles |
04 | Prepare the Substrate and Apply Correct Adhesive Once the damaged tiles are removed, the substrate must be assessed and properly prepared before any new tile is installed. This is the step that determines whether the repair lasts — cutting it short is the most common cause of repeat failure. • Inspect the substrate: check for signs of water damage, mould, efflorescence (white mineral deposits on the wall face) or softness — any of these indicates that a repair at tile level alone is insufficient • Clean the adhesive bed: remove all old adhesive residue from the substrate face — a flexible scraper and wire brush are appropriate; ensure the surface is level within 2mm • Apply waterproofing: in a hammam environment, apply a brush-applied waterproofing membrane (e.g. Mapelastic or equivalent) to the exposed substrate before setting new tiles — this is non-negotiable • Use the correct adhesive: a flexible polymer-modified tile adhesive (C2TE specification or equivalent) applied by the floating/buttering method to ensure 100% coverage beneath each zellige tile |
05 | Set New Zellige Tiles and Re-Grout Setting zellige tiles correctly requires the floating bed technique — not the notched-trowel method used for standard ceramic tile. Each tile must be individually bedded, adjusted for level, and supported until the adhesive achieves initial set. • Pre-soak zellige tiles in clean water for 5–10 minutes before installation — dry zellige will wick moisture from the adhesive, weakening the bond • Apply adhesive to both the substrate and the back of each tile (double-buttering) — this ensures full coverage despite the irregular back surface of handmade zellige • Tap each tile gently into position with a rubber mallet and check level — adjust the adhesive bed thickness tile-by-tile as required by the natural thickness variation of zellige • Allow adhesive to cure fully before grouting — minimum 24 hours in UAE ambient conditions, longer in high-humidity areas • Grout with a flexible, sanded grout in a colour matched to the original — apply with a rubber float and clean off excess immediately with a barely damp sponge • Seal all internal corners and movement joints with a flexible silicone sealant colour-matched to the grout — never fill these with grout |
06 | Seal and Protect the Restored Installation Zellige tiles in a UAE hammam must be sealed after installation and after any restoration work — this is not optional. An impregnating stone and tile sealant applied to the zellige surface and grout reduces moisture penetration, slows mineral deposit adhesion, and dramatically extends the time between required deep cleans. • Allow grout to cure for a minimum of 7 days before sealing — premature sealing traps moisture in the grout body • Apply an impregnating sealant specifically rated for use on glazed terracotta or zellige — test on a spare tile first to confirm the product does not alter the appearance of the glaze • Apply two thin coats — the second coat applied after the first has absorbed but before it has fully cured • Re-seal annually in UAE hammam conditions — the combination of hard water and high steam exposure degrades sealant faster than in standard bathroom environments |
How to Prevent Zellige Cracking in UAE Hammams — Ongoing Care
The most effective restoration is the one you never need to do. Once your zellige has been restored — or if you have a new installation that you want to protect — the following care routine will dramatically reduce the risk of future cracking.
Daily and Post-Session Care:
- Wipe zellige surfaces with a dry microfibre cloth after every hammam session — remove condensation before it dries and deposits minerals
- Avoid thermal shock — where possible, allow the hammam to cool gradually rather than activating air conditioning immediately after a session
- Never use acid-based cleaners, vinegar, or commercial bathroom descalers on zellige surfaces — use only pH-neutral cleaners specifically approved for zellige or glazed terracotta
Weekly Maintenance:
- Clean zellige surfaces with warm water and a pH-neutral soap solution — a soft brush for grout lines, a microfibre cloth for tile faces
- Inspect grout lines for early signs of crumbling, cracking or colour change — early grout repair prevents water ingress to the adhesive bed
- Check the condition of sealant in internal corners — a failing corner sealant bead is one of the most common water ingress points in UAE hammam installations
Annual Professional Maintenance:
- Professional deep clean using pH-neutral specialist zellige cleaner — removes mineral deposits without acid damage
- Tap test of all tiles — identify any new hollow areas before they progress to cracking
- Re-seal all tile and grout surfaces with appropriate impregnating sealant
- Inspect and replace any deteriorating silicone sealant at corners and movement joints
- Professional steam generator and nozzle descaling — mineral-laden steam is a direct contributor to zellige glaze degradation
🏛️ Understanding the Investment You Are Protecting • A quality zellige hammam installation in a UAE property typically represents an investment of AED 50,000–250,000 or more in materials and skilled labour • Replacement cost for cracked zellige — including specialist removal, substrate repair, matching tile sourcing from Morocco, and professional re-installation — routinely exceeds AED 15,000–40,000 for a partial restoration • The annual maintenance cost to prevent cracking is a small fraction of the restoration cost — and preserves both the financial and aesthetic value of one of the most unique interior features in a UAE property |
When DIY Is Appropriate — and When to Call a Specialist
Being honest about the limits of DIY repair is important with zellige — this is not a forgiving material, and an unsuccessful DIY repair can create more damage than the original cracking.
SCENARIO | APPROACH | REASON |
Glaze crazing only (Stage 1) — tiles solid when tapped | DIY care protocol | No tile removal needed — address cleaning products and maintenance regime |
1–3 individual cracked tiles, all others solid | Specialist recommended | Sourcing matching tiles and correct adhesive application requires expertise |
Multiple cracked tiles (4+) in any zone | Specialist mandatory | Scale suggests systemic cause — substrate and waterproofing assessment required |
Any hollow-sounding tiles | Specialist mandatory | Hollow tiles indicate adhesive failure — risk of further cracking if walked on |
Tiles lifting or loose at edges | Specialist mandatory | Water ingress likely — substrate assessment and waterproofing renewal required |
Cracking along structural lines | Structural engineer + specialist | Building movement cause must be addressed before tile repair |
Full-section delamination or missing tiles | Full specialist restoration | Complete re-installation of affected area — DIY will not produce acceptable result |
Zellige tile cracking in UAE hammams is a specific, diagnosable problem — not an inevitable consequence of using a traditional handmade tile in a modern setting. The causes are well understood: thermal shock from rapid heat cycling, moisture and mineral penetration accelerated by the UAE’s hard water, incorrect adhesive products and installation technique, structural movement without proper expansion joints, chemical damage from acid cleaners, and non-specialist original installation. Every one of these causes can be addressed — either through restoration of existing damage or through preventative care that stops the damage occurring in the first place.
If your UAE hammam zellige is showing signs of cracking, the most important steps are to stop using any acid-based cleaning products immediately, to conduct a tap test to assess the extent of hollow tiles, and to engage a specialist with documented zellige experience for an assessment before the damage progresses further.
A well-maintained zellige hammam is one of the most enduring and visually extraordinary interior features possible in a UAE property. With the right knowledge and the right professional support, it will last — and perform — for decades.
Frequently Asked Questions
Zellige tiles crack more frequently in UAE hammams than in traditional Moroccan settings for three primary reasons. First, the UAE’s tap water is among the hardest in the world — with Total Dissolved Solids levels of 400–600 ppm or more — compared to the much softer water in most Moroccan cities. This hard water penetrates the porous zellige body and leaves mineral deposits that expand during the drying cycle, progressively weakening the tile structure. Second, the modern UAE hammam uses rapid electric or steam heating rather than the slow, gentle hypocaust system of traditional Moroccan hammams — this creates much more severe thermal cycling that stresses the glaze-to-clay bond. Third, many UAE zellige installations are fitted by general tilers rather than zellige specialists, resulting in incorrect adhesive selection and installation technique that creates voids beneath tiles — the primary cause of cracking under load.
The answer depends on the stage and nature of the cracking. Stage 1 damage — where only the glaze surface shows fine crazing with no through-cracks and all tiles remain firmly bonded — does not require tile replacement. The appropriate response is to improve the maintenance regime, switch to pH-neutral cleaning products, and apply an impregnating sealant to protect the weakened glaze from further moisture and mineral penetration. For Stage 2 or Stage 3 damage — where cracks pass through the tile body, tiles are hollow-sounding, or tiles are lifting — the cracked tiles must be physically replaced. There is no filler or surface repair product that produces an acceptable and durable result on cracked zellige in a high-heat, high-humidity environment. Any surface repair product will fail quickly under hammam conditions.
The best cleaner for zellige tiles in a UAE hammam is a pH-neutral soap or specialist stone-and-tile cleaner with a pH of 6–8. Warm water with a small amount of pH-neutral liquid soap, applied with a soft brush or microfibre cloth, is the safest and most effective routine cleaning method. Never use white vinegar, citric acid, commercial bathroom descalers, bleach, or any product with a pH below 6 or above 9 on zellige surfaces. These products chemically attack the traditional glass glaze of zellige, causing progressive dulling, crazing and ultimately structural weakening of the glaze layer. For limescale deposits that have accumulated despite regular cleaning, contact a specialist — professional limescale removal from zellige requires specialist pH-neutral mineral deposit removers applied carefully by an experienced technician.
The duration of zellige restoration in a UAE hammam depends on the extent of the damage and the scope of work required. A minor repair of 5–10 individual tiles — including sourcing replacement tiles, careful removal, substrate preparation, installation and grouting — typically takes 2–3 working days, plus a further 7 days of curing time before the hammam can be returned to use. A full-section or complete hammam re-tiling project involving removal of all existing zellige, substrate repair and waterproofing renewal, and full re-installation, typically takes 10–20 working days depending on the size of the space, plus a 7–14 day curing period. If matching replacement tiles need to be sourced from Morocco, allow 3–6 weeks for delivery before the physical restoration work can begin. Always factor sourcing time into any restoration timeline when planning around hotel operations or residential use.
The cost of zellige restoration in Dubai varies significantly depending on the extent of damage, the accessibility of the hammam space, and whether replacement tiles need to be imported from Morocco. As a general guide, individual tile replacement — including specialist labour, adhesive materials and grout — typically costs AED 150–400 per tile depending on complexity and access. A partial restoration of a wall section (approximately 2–5 sqm) including substrate repair and waterproofing renewal typically ranges from AED 3,500 to AED 12,000. A full hammam re-tiling project in an average-sized residential hammam of 10–20 sqm — including full removal, substrate preparation, waterproofing, specialist zellige installation and finishing — typically ranges from AED 25,000 to AED 80,000 or more, depending on the complexity of the original design pattern and the source of replacement tiles. These figures are indicative — always obtain a site-assessed, itemised quote from a specialist before committing to any restoration project.